libxlsxwriter
Loading...
Searching...
No Matches
Working with Object Positioning

Libxlsxwriter positions worksheet objects such as images and charts in worksheets by calculating precise co-ordinates based on the object size, it's DPI (for images) and any scaling that the user specifies. It also takes into account the heights and widths of the rows and columns that the object crosses. In this way objects maintain their original sizes even if the rows or columns underneath change size or are hidden.

For example:

#include "xlsxwriter.h"
int main() {
lxw_workbook *workbook = workbook_new("images.xlsx");
lxw_worksheet *worksheet = workbook_add_worksheet(workbook, NULL);
// Original image.
worksheet_insert_image(worksheet, CELL("B2"), "logo.png");
// Same as original, despite row/col changes.
worksheet_insert_image(worksheet, CELL("E8"), "logo.png");
// Make column F narrower.
worksheet_set_column(worksheet, COLS("F:F"), 2, NULL);
// Hide row 12 (zero indexed).
lxw_row_col_options row_options = {.hidden = LXW_TRUE};
worksheet_set_row_opt(worksheet, 11, LXW_DEF_ROW_HEIGHT, NULL, &row_options);
workbook_close(workbook);
return 0;
}
@ LXW_TRUE
Definition: common.h:54
Options for rows and columns.
Definition: worksheet.h:840
uint8_t hidden
Definition: worksheet.h:842
Struct to represent an Excel workbook.
Definition: workbook.h:293
Struct to represent an Excel worksheet.
Definition: worksheet.h:2108
#define COLS(cols)
Convert an Excel A:B column range into a (col1, col2) pair.
Definition: utility.h:64
#define CELL(cell)
Convert an Excel A1 cell string into a (row, col) pair.
Definition: utility.h:46
lxw_workbook * workbook_new(const char *filename)
Create a new workbook object.
lxw_error workbook_close(lxw_workbook *workbook)
Close the Workbook object and write the XLSX file.
lxw_worksheet * workbook_add_worksheet(lxw_workbook *workbook, const char *sheetname)
Add a new worksheet to a workbook.
lxw_error worksheet_insert_image(lxw_worksheet *worksheet, lxw_row_t row, lxw_col_t col, const char *filename)
Insert an image in a worksheet cell.
#define LXW_DEF_ROW_HEIGHT
Definition: worksheet.h:77
lxw_error worksheet_set_column(lxw_worksheet *worksheet, lxw_col_t first_col, lxw_col_t last_col, double width, lxw_format *format)
Set the properties for one or more columns of cells.
lxw_error worksheet_set_row_opt(lxw_worksheet *worksheet, lxw_row_t row, double height, lxw_format *format, lxw_row_col_options *options)
Set the properties for a row of cells.

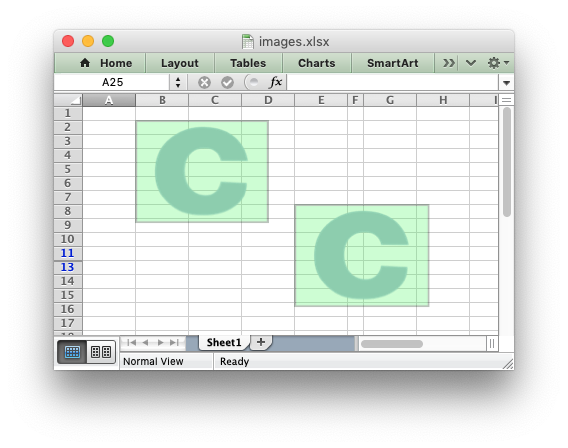
As can be seen the inserted images are the same size even though the second image crosses changed rows and columns.

However, there are two cases where the image scale may change with row or columns changes. These are explained in the next two sections.

Object scaling due to automatic row height adjustment

The scaling of a image may be affected if is crosses a row that has its default height changed due to a font that is larger than the default font size or that has text wrapping turned on. In these cases Excel will automatically calculate a row height based on the text when it loads the file. Since this row height isn't available to Libxlsxwriter when it creates the file the object may appear as if it is sized incorrectly. For example::

#include "xlsxwriter.h"
int main() {
lxw_workbook *workbook = workbook_new("images.xlsx");
lxw_worksheet *worksheet = workbook_add_worksheet(workbook, NULL);
lxw_format *wrap = workbook_add_format(workbook);
worksheet_write_string(worksheet, CELL("A10"), "Some text that wraps", wrap);
worksheet_insert_image(worksheet, CELL("B1"), "logo.png");
worksheet_insert_image(worksheet, CELL("B10"), "logo.png");
workbook_close(workbook);
return 0;
}
void format_set_text_wrap(lxw_format *format)
Wrap text in a cell.
Struct to represent the formatting properties of an Excel format.
Definition: format.h:359
lxw_format * workbook_add_format(lxw_workbook *workbook)
Create a new Format object to formats cells in worksheets.
lxw_error worksheet_write_string(lxw_worksheet *worksheet, lxw_row_t row, lxw_col_t col, const char *string, lxw_format *format)
Write a string to a worksheet cell.

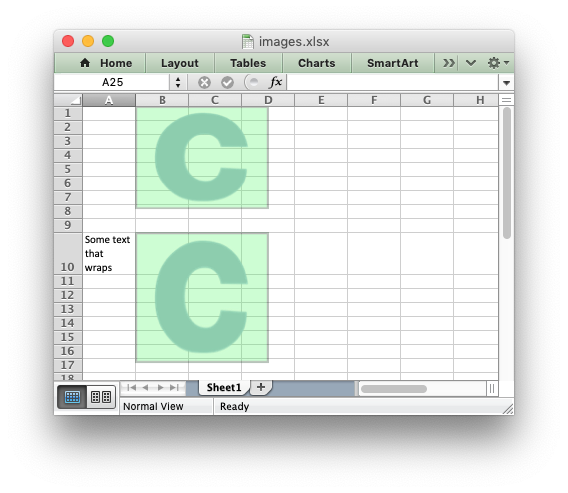
As can be seen the second inserted image is distorted, compared to the first, due to the row being scaled automatically. To avoid this you should explicitly set the height of the row using worksheet_set_row() if it crosses an inserted object.

Object Positioning with Cell Moving and Sizing

Excel supports three options for "Object Positioning" within a worksheet:

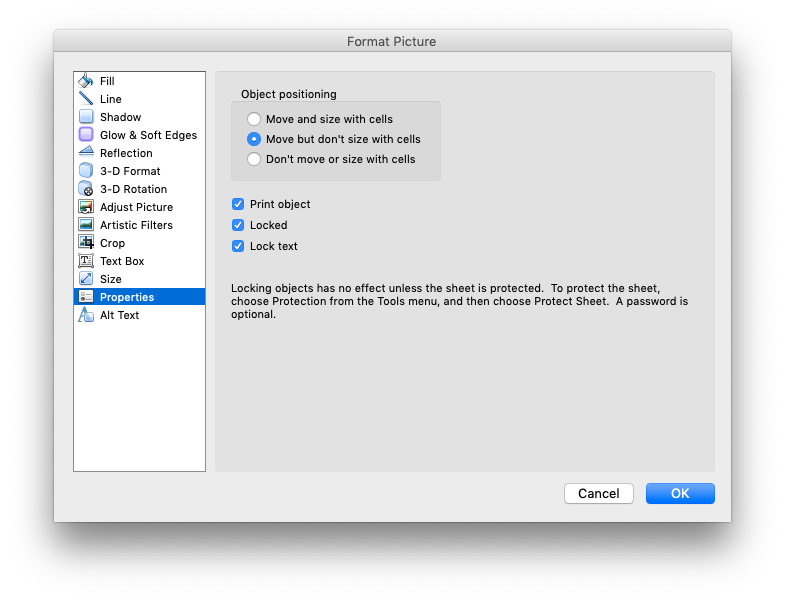
Image and chart objects in Libxlsxwriter emulate these options using the object_position parameter in lxw_image_options and lxw_chart_options:

worksheet_insert_image_opt(worksheet, CELL("E9"), "red.png", &options);
Options for inserted images.
Definition: worksheet.h:1702
uint8_t object_position
Definition: worksheet.h:1718
lxw_error worksheet_insert_image_opt(lxw_worksheet *worksheet, lxw_row_t row, lxw_col_t col, const char *filename, lxw_image_options *options)
Insert an image in a worksheet cell, with options.
@ LXW_OBJECT_MOVE_AND_SIZE
Definition: worksheet.h:663

Where object_position has one of the following allowable values from lxw_object_position:

  1. LXW_OBJECT_MOVE_AND_SIZE: Move and size with cells. This is the Excel default for charts.
  2. LXW_OBJECT_MOVE_DONT_SIZE: Move but don’t size with cells. This is the Excel default for images.
  3. LXW_OBJECT_DONT_MOVE_DONT_SIZE: Don’t move or size with cells.
  4. LXW_OBJECT_MOVE_AND_SIZE_AFTER: Same as Option 1 to "move and size with cells" except Libxlsxwriter applies hidden cells after the object is inserted.

Option 4 appears in Excel as Option 1. However, the worksheet object is sized to take hidden rows or columns into account. This allows the user to hide an image in a cell, possibly as part of an autofilter. For example:

#include "xlsxwriter.h"
int main() {
lxw_workbook *workbook = workbook_new("images.xlsx");
lxw_worksheet *worksheet = workbook_add_worksheet(workbook, NULL);
worksheet_insert_image( worksheet, CELL("B4"), "logo.png");
worksheet_insert_image_opt(worksheet, CELL("B13"), "logo.png", &image_options);
// Hide the rows that contain the images.
lxw_row_col_options row_options = {.hidden = LXW_TRUE};
for (int row_num = 1; row_num < 22; row_num++)
worksheet_set_row_opt(worksheet, row_num, LXW_DEF_ROW_HEIGHT, NULL, &row_options);
workbook_close(workbook);
return 0;
}
@ LXW_OBJECT_MOVE_AND_SIZE_AFTER
Definition: worksheet.h:673

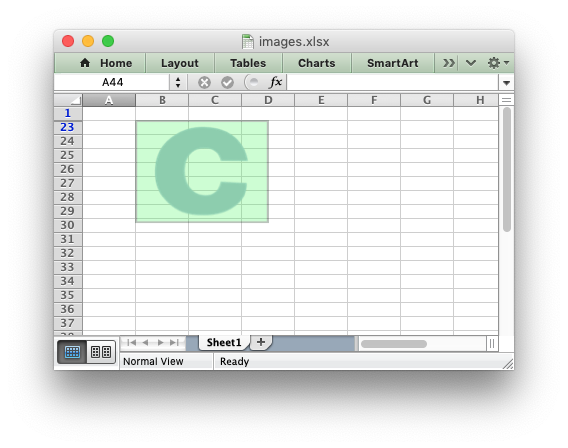
In this example the first inserted image is visible over the hidden rows whilst the second image is hidden with the rows. Unhiding the rows in Excel would reveal the second image.

Image sizing and DPI

When an image is imported into Excel the DPI (dots per inch) resolution of the image is taken into account. Excel sizes the image according to a base DPI of 96 dpi. Therefore an image with a DPI of 72 may appear slightly larger when imported into Excel while an image with a DPI of 200 may appear twice as small. Libxlsxwriter also reads the DPI of the images that the user inserts into a worksheet and stores the image dimensions in the same way that Excel does. If it cannot determine the DPI of the image it uses a default of 96.

Reporting issues with image insertion

A lot of work has gone into ensuring that Libxlsxwriter inserts images into worksheets in exactly the same way that Excel does, even though the required calculations and units are arcane. There are over 80 test cases that check image insertion against files created in Excel to ensure that Libxlsxwriter's handling of images is correct.

As such, before reporting any issues with image handling in Libxlsxwriter please check how the same image is handled in Excel (not OpenOffice, LibreOffice or other third party applications). If you do report an issue please use the Libxlsxwriter Issue tracker is on GitHub that demonstrates the issue.

Next: Working with Autofilters